For mine I used 10" of 1/2" wide elastic.
First we'll need to make the template. You need to decide how high and how long you'd like them to be. I put my pockets into the large Companion Carpet bag so decided on 7" tall and 10" wide.
The template will be half the pockets, so will need to be cut on the fold.
Using a blank piece of paper, draw a line as tall as you'd like the pocket to be, plus 1/2" for seams. Place your line as far to the left as you can. You can even use the edge of the paper as your line.
I made my line 7 1/2" tall.
Next draw a line to the base of the left hand 'fold' line to be half your desired width, plus 1/4" for seams. I made my bottom line 5 1/4".
 |
| Left, bottom and top lines drawn |
Next draw a line to the top of the left hand 'fold' line to be 3 1/4" longer than your bottom line. I made mine 8 1/2" long.
Finally, connect the top and bottom lines with a straight line.
Now that you've got your template drawn, cut it out and it's ready to use.
Cut two, on the fold per pocket. I like to use medium weight interfacing on the outers of my elasticated pockets.
You'll be using a 1/4" seam allowance for sewing the pocket.
Pin and then stitch the two pieces together along all four edges, leaving a generous turning gap at the bottom. I have marked the turning gap with double pins. Trim the corners.
Turn the pocket through the turning gap and press well.
Stitch a line of top stitching 1/8" from the top and another 3/4" from the top.
Using an unpicker, remove the stitching from the side seams on both sides, between the two rows of top stitching.
Attach a safety pin to the end of the elastic and then thread through the casing created by your two rows of stitching.
When you have pushed it through enough, leave 1/8" poking out and stitch over the end a few times to secure it. You can then trim the excess elastic using small scissors.
Continue pushing the safety pin through the casing until it reaches the other side.
Remove the safety pin and then with 1/8" of elastic still showing, secure with a few rows of stitching as before. Trim the excess elastic.
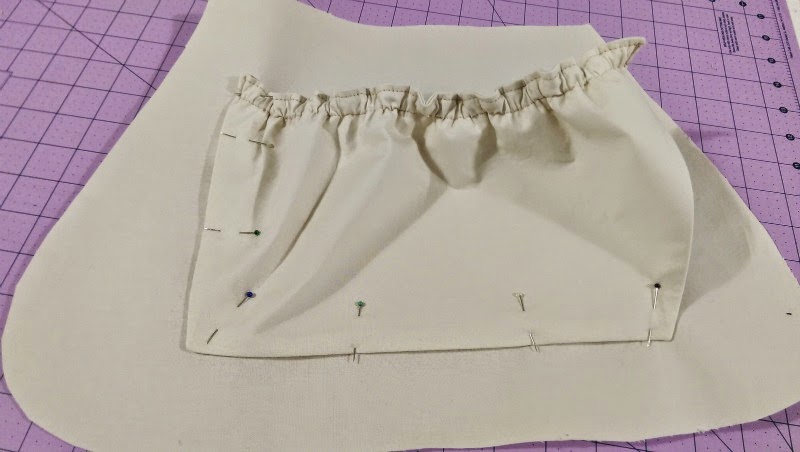
Place the bottom of the elasticated pocket on your bag lining piece, 2" from the bottom and in the centre. Your turning gap will be closed when the pocket is stitched down.
Manipulate the pocket so that the corner is a right angle, and then pin the side. The top of the side should be approximately 2" from the side of the bag lining.
Repeat for the other side of the pocket so that both bottom corners are right angles and then stitch near to the edge. Make sure you stitch really well at the top corners, there's going to be a lot of stress on these edges when putting things into the pockets.
Ensure the elastic is distributed evenly through the top casing.
If you wish to divide the pocket into two, flatten the pocket around the centre (ish!) and pin through the pocket and the lining. This is just so that it lays flat enough to measure and mark.
Using an erasable fabric marker (I use a Chaco liner), measure and mark the centre of the bottom of the pocket.
Now draw a line the height of the pocket up the centre using your centre mark for guidance.
Stitch up that line remembering to back stitch well at the top.
That's it! You've made your elasticated pockets. Which happen to look like boobies when viewed from the side. Oh well, it could be worse!
Companion carpet bags are starting to appear in the Bag of the Month Club Flickr Group, have you started yours yet?


